So! You’ve got a guitar that’s in tune (lesson 1) and you’ve learned your note names (lesson 4) on the E and A string. Our next step is to use octave patterns to identify notes on the remaining strings.
Octave patterns from the E string:
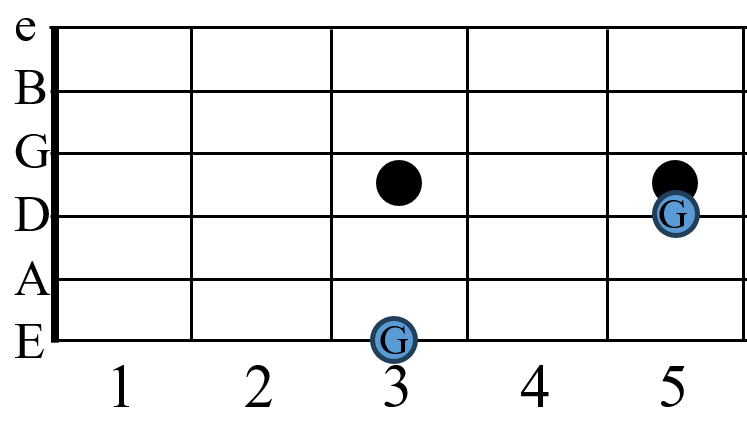
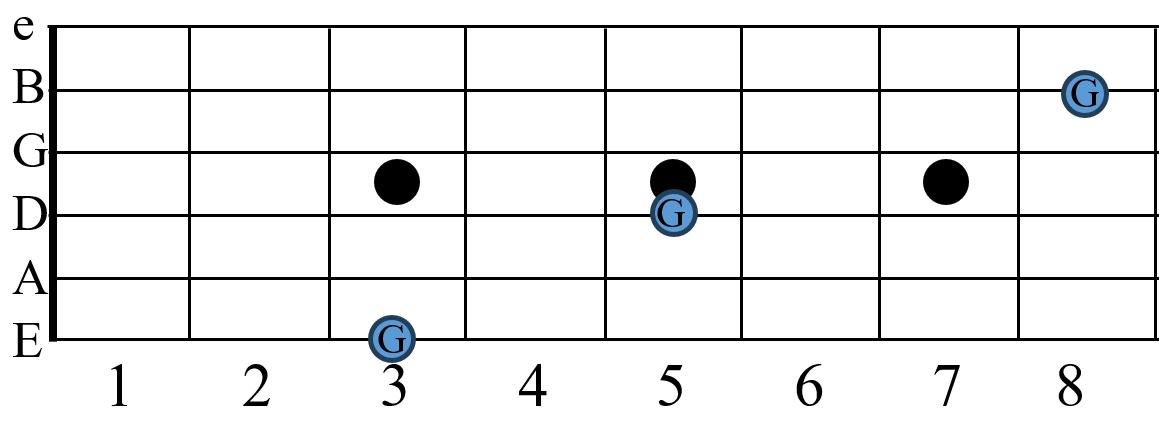
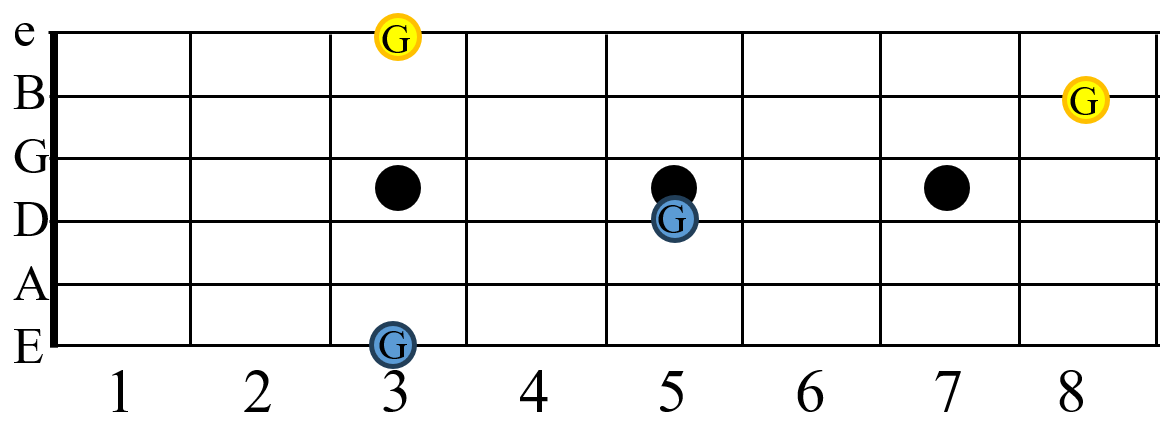
Let’s take our “G” note (3rd fret) on low E string. We can find the next “G” an octave up by going two frets up and two strings down. This will bring you to the 5th fret of the D string.
From that newly found “G” note, we will go 3 fret’s up and two strings down bringing you to the 8th fret of the B string
Last but not least, you can also find that 2nd octave “G” note on the 3rd fret of your high E string. I put these in yellow just to highlight that its the same note.
Spend some time with this diagram. Commit these patterns to memory! We’ll be using them as we dive deeper in to guitar theory.
Okay! Let’s now apply this pattern to a few notes with the idea that you can apply this pattern all across the fretboard.
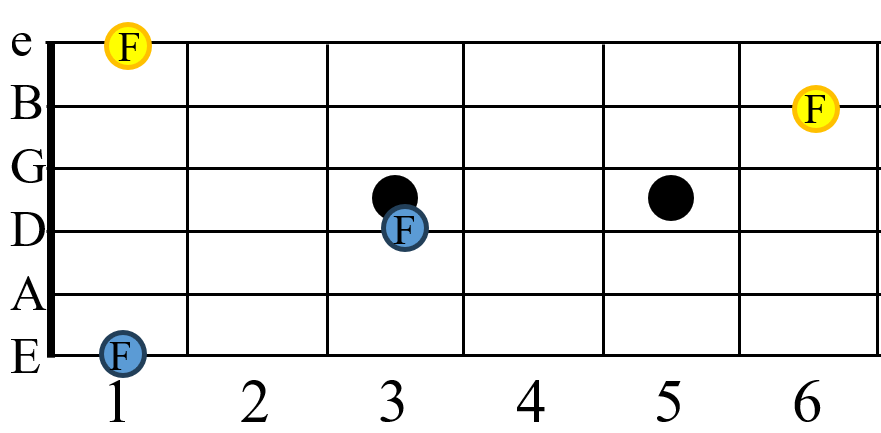
Find F notes using the octave patterns:
Find A# notes using the octave patterns:
Apply this octave pattern across the fretboard. Identify the note name, play the patterns and listen to how they sound. If you are playing them correctly (and your guitar is in tune) it should be clear that you are playing the same note at a higher frequency.
On to the A string!
Octave patterns from the A string:
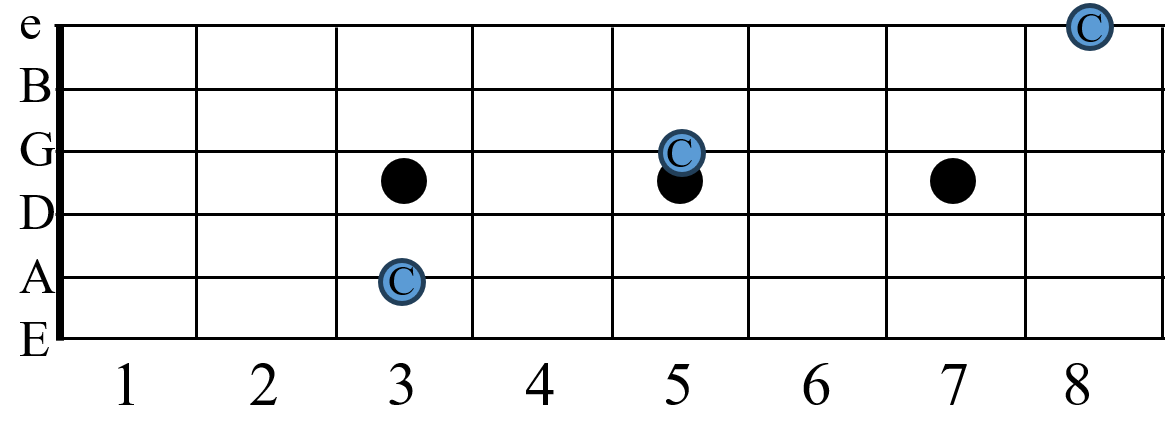
Good news! It’s the same structure as the octave patterns from the E string. Two frets up, Two strings down; Three frets up, two strings down.
Play this C note and its octaves:
Let’s run a few examples:
Play me a D and the octaves:
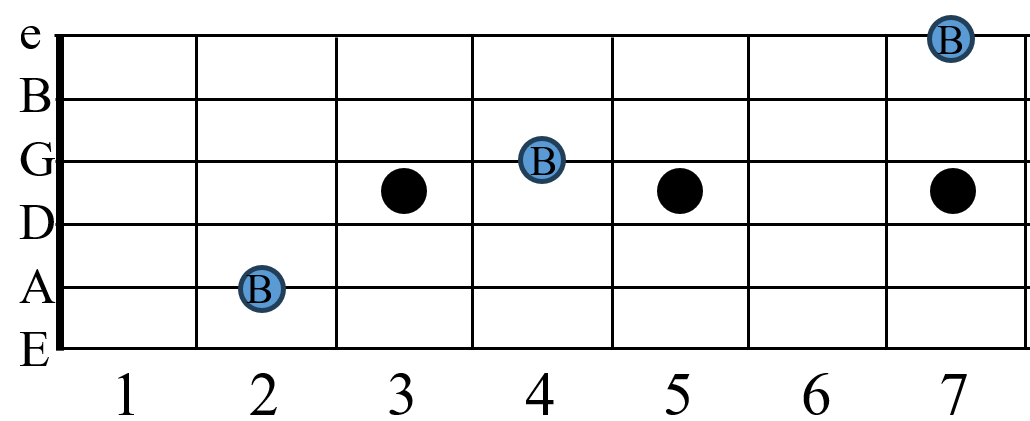
Play a B and the octaves:
Run a few more examples on your own. Say the note name aloud and play the octaves.
We’ll apply what we’ve learned about note names and octaves to power chords in lesson 4.2
Happy practice!
Video lesson available to subscribers :)


